The Exposure Triangle

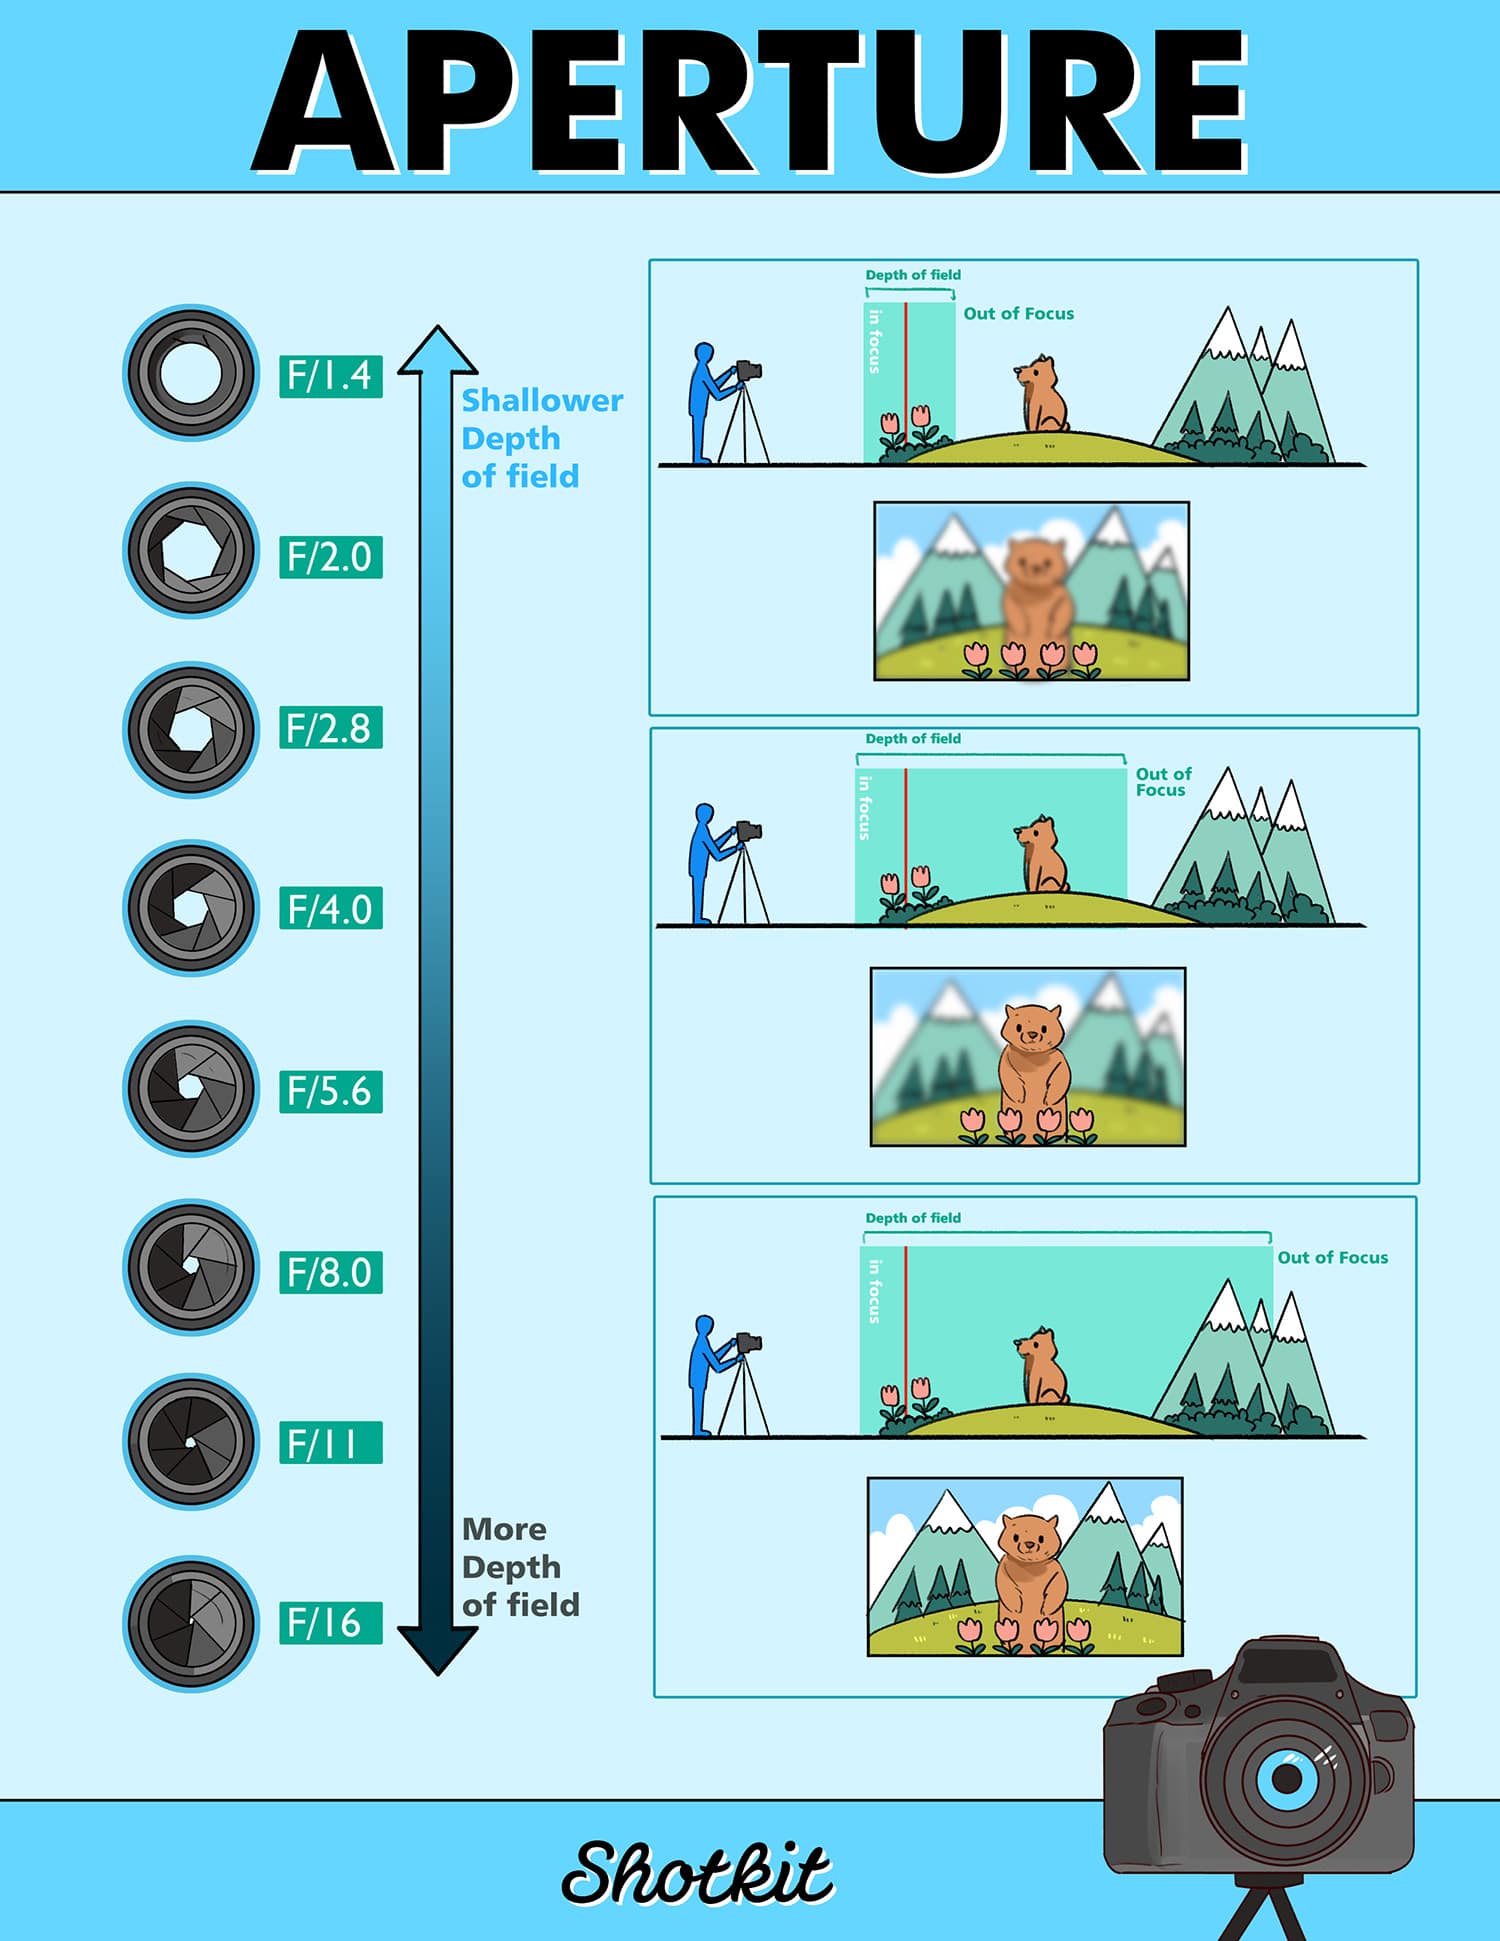
A larger aperture means that there will be less light in, resulting in a deep depth of field, on the other hand, a smaller aperture results in a shallow depth of field.

Camera Stimulator


shallow depth of field photograph
This assignment is using a natural light with shallow depth of field


Get Closer!!!!!
Soft defused light with a bokeh background to capture natural portrait
Equipment
– 50mm 1.8 prime lens
– Tripod
– Reflector
– film camera (35mm/medium/large format)
Camera Setting (approximate)
Large Aperture: f1.8, f2.8 (wide aperture – shallow depth of field)
Shutter: 1/100
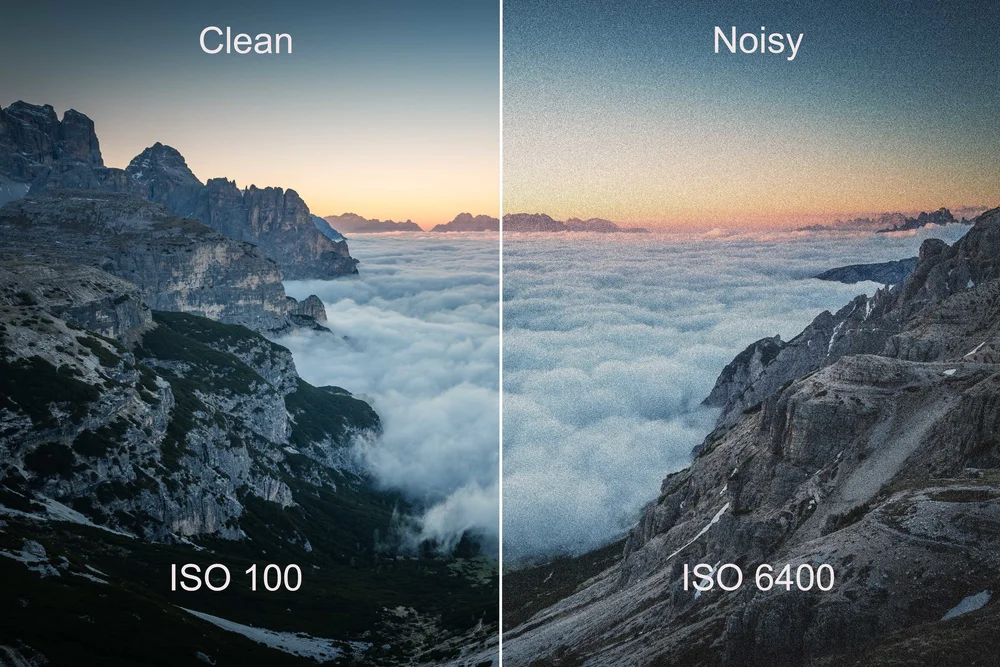
ISO: 800
Lighting
– North facing window
Direction of Subject
– Position your model next to a north facing window / in the shade
– Use a reflector to bounce light and reduce shadows
Portraiture
Define portraiture and introduce the project
Inspiration


Natural Sunlight
Using a gold reflector, we reflected the sunlight onto the models face, leaving shadows on parts of her face. This can also be Rembrandt lighting, this is the triangle on one side of her face. We didn’t use artificial light during this, only the sunlight which was during “golden hour”. we had the model side on to the sun where as the reflector faced the sun straight on. We had the aperture set to a lower number so that the subject was in focus.


Natural Depth Of Field
For natural depth of field, we had the models side on but facing the camera, one was no smiling, one was smiling without teeth and the final was smiling with teeth, to do this we used a silver reflector to bounce the light off when it wasn’t sunny, we also changed the aperture so that the model was in focus but the background wasn’t.


Studio Lighting
Using strobe lighting, we took photos in different locations, to see how the light affected the outcome, to take this photo we had a gold reflector, a strobe light and the camera, we had the model positioned so they were facing the reflector that was bouncing the light on to their faces, we had one of a blank expression, one as a smile and one talking so it seemed more natural.


Dynamic Lighting Using Coloured Gels
For this we covered strobe lights in coloured gels and placed them on opposite sides of the models face, this created the affect of having 2 different colours on each side of the face. The camera was set up in the middle of the lights and we had the model sat facing the camera.
Visual Analysis


Evaluation
Overall after trying lots of different types of lighting, i found that some worked better than others, when trying dynamic lighting, i found that some colours worked better together than others, and complimented the model more. Whilst working through this project i found it difficult to work with the exposure triangle and get the camera settings to work the way they needed to, to make the photo right. I have kept my website up to date with all the photos i have taken to make sure i know where they all are. I put them in order of when i did them, i did 3 of each so it shows my attempts at all of them, this means that i can see the progress i have made.